Introduction:
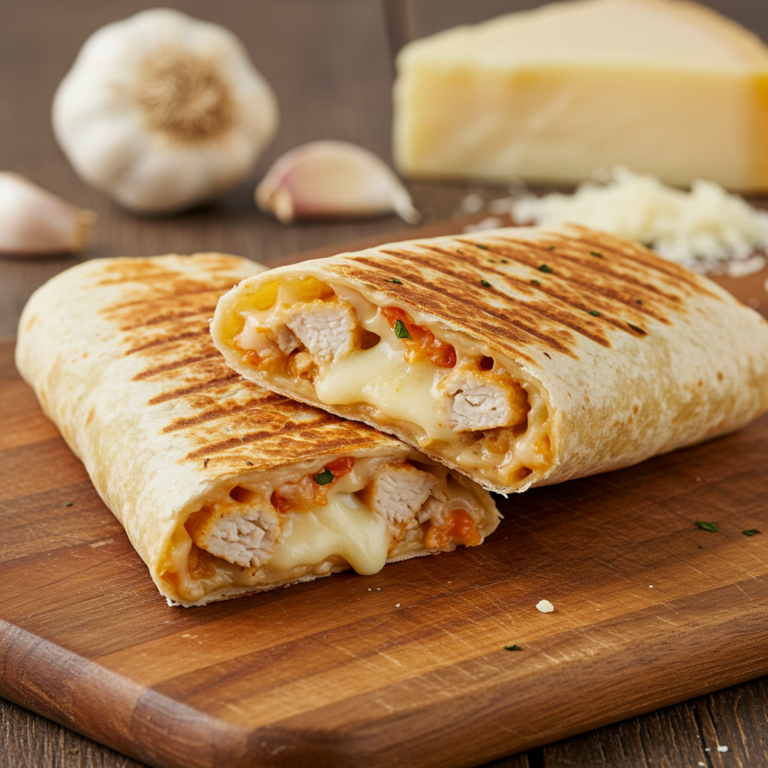
If you love the combination of cheesy goodness, crispy tortillas, and garlicky flavor, these Cheesy Garlic Chicken Wraps are going to be your new favorite meal. They’re easy to make, packed with flavor, and perfect for any time of the day—whether it’s lunch, dinner, or even a quick snack.
These wraps feature juicy, seasoned chicken cooked to perfection, gooey melted cheese, and a delicious garlic butter spread, all wrapped in a golden, crispy tortilla. The best part? They come together in under 30 minutes!
In this ultimate guide, we’ll cover:
- A detailed step-by-step recipe
- Cheese and seasoning variations
- Best cooking methods (skillet, air fryer, oven)
- Pro tips for extra flavor
- FAQs, storage tips, and serving ideas
Let’s dive in!
Why You’ll Love These Cheesy Garlic Chicken Wraps
- Quick & Easy – Made in less than 30 minutes!
- Super Cheesy – Packed with mozzarella, cheddar, and Parmesan.
- Crispy & Buttery – Golden tortillas brushed with garlicky butter.
- Customizable – Add veggies, swap proteins, or make it spicy.
- Great for Meal Prep – Make them ahead and reheat later!
Ingredients for the Best Cheesy Garlic Chicken Wraps
Before we get started, make sure you have these simple yet flavorful ingredients:
For the Chicken
- 2 boneless, skinless chicken breasts, cut into thin strips
- 1 teaspoon garlic powder
- 1 teaspoon onion powder
- ½ teaspoon smoked paprika (adds a subtle smoky kick)
- ½ teaspoon salt
- ½ teaspoon black pepper
- 1 tablespoon olive oil
The Garlic Butter Spread
- 3 tablespoons butter (melted)
- 2 cloves garlic, minced
- ½ teaspoon dried parsley
- ¼ teaspoon salt
For the Wraps
- 4 large flour tortillas
- 1 ½ cups shredded mozzarella cheese
- ½ cup grated Parmesan cheese
- ¼ cup cheddar cheese (optional, for extra sharpness)
- ¼ cup sour cream or ranch dressing (for added creaminess, optional)
Optional Add-Ons for Extra Flavor
- Sautéed onions & bell peppers for a slight sweetness
- Crispy bacon crumbles for crunch
- Hot sauce or red pepper flakes for heat
- Spinach or arugula for a fresh bite
Check out this warm and comforting recipe: Hamburger Potato Soup
Step-by-Step Guide: How to Make Cheesy Garlic Chicken Wraps
Making Cheesy Garlic Chicken Wraps is incredibly easy, but following the right steps will maximize flavor and texture. In this expanded step-by-step guide, I’ll break down each stage in detail, covering the best techniques, tips, and variations to help you create the ultimate crispy, cheesy, garlicky wrap!
Step 1: Season and Cook the Chicken
The key to delicious, flavorful chicken is seasoning it well and cooking it just right. Follow these steps for juicy, well-seasoned chicken:
1. Prepare the Chicken Strips
- Take 2 boneless, skinless chicken breasts and slice them into thin, even strips.
- Slicing evenly ensures that the chicken cooks uniformly.
- If you prefer bite-sized pieces, you can dice the chicken instead.
2. Seasoning the Chicken
In a small bowl, mix together:
- 1 teaspoon garlic powder – Enhances the garlic flavor in the wrap.
- 1 teaspoon onion powder – Adds depth to the seasoning.
- ½ teaspoon smoked paprika – Gives a subtle smoky kick.
- ½ teaspoon salt – Essential for balancing flavors.
- ½ teaspoon black pepper – Adds mild heat.
Optional Add-Ons for Extra Flavor:
- Add ½ teaspoon Italian seasoning for a herby touch.
- For a spicier version, mix in ¼ teaspoon cayenne pepper.
Now, toss the chicken strips in the spice blend until fully coated. This ensures every bite is flavorful.
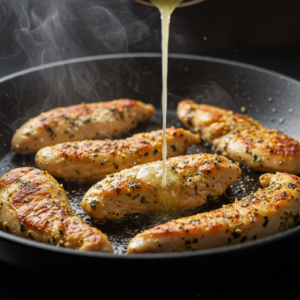
3. Cooking the Chicken
- Heat 1 tablespoon olive oil in a large skillet over medium heat.
- Add the seasoned chicken strips in a single layer (avoid overcrowding the pan).
- Cook for 5-6 minutes per side, flipping halfway through, until the chicken is golden brown and fully cooked.
- Remove the chicken from the pan and let it rest for 5 minutes before using it in the wraps.
Pro Tip: If you want extra juicy chicken, cover the pan for the last 2 minutes of cooking to trap in moisture.
Step 2: Prepare the Garlic Butter Spread
This garlic butter spread is what gives these wraps their signature rich, garlicky flavor and crispy texture. Here’s how to make it:
1. Melt the Butter
- Melt 3 tablespoons butter in a small saucepan over low heat or in the microwave for 20-30 seconds.
- Stir occasionally to ensure it doesn’t burn.
2. Add Garlic and Seasonings
To the melted butter, add:
- 2 cloves garlic, minced – Fresh garlic enhances the flavor.
- ½ teaspoon dried parsley – Adds a touch of freshness.
- ¼ teaspoon salt – Enhances the buttery, garlicky taste.
Mix everything well and let it sit for 5-10 minutes to allow the garlic to infuse the butter.
Pro Tip: For a stronger garlic flavor, use roasted garlic instead of raw. Just mash roasted garlic cloves into the butter for a milder, sweeter garlic taste.
Step 3: Assemble the Wraps
1. Lay Out the Tortillas
- Use large, soft flour tortillas for the best results.
- If your tortillas feel stiff, microwave them for 10-15 seconds to make them pliable.
2. Spread a Creamy Base (Optional)
For extra creaminess, spread a thin layer of:
- Sour cream
- Ranch dressing
- Garlic aioli
This step is optional, but it adds richness and moisture to the wrap.
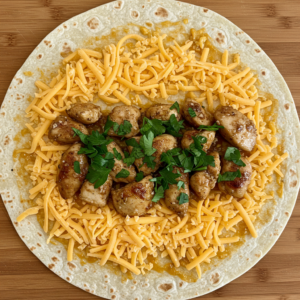
3. Layer the Cheese
- Sprinkle ½ cup of shredded mozzarella cheese evenly over the tortilla.
- Add ¼ cup cheddar cheese for extra sharpness.
- Sprinkle grated Parmesan cheese for a bold, salty touch.
Pro Tip: Placing cheese both under and over the chicken ensures an extra cheesy wrap with a great melt.
4. Add the Cooked Chicken
- Distribute the cooked chicken strips evenly across the cheese.
- If using additional toppings like bacon, sautéed onions, or jalapeños, add them now.
5. Fold the Wrap Properly
To ensure nothing falls out while toasting, use this method:
- Fold both sides inward toward the center.
- Roll the tortilla tightly from the bottom up like a burrito.
- Make sure the seam is at the bottom to hold the wrap in place.
Pro Tip: Press the wrap lightly with your hands to help everything stick together.
Looking for cheesy delights? Try: Cheese Breadsticks Recipe
Step 4: Toast the Wraps Until Golden & Crispy
Now, let’s cook the wraps to crispy, golden perfection!
1. Brush with Garlic Butter
- Generously brush the outside of each wrap with the prepared garlic butter.
- This gives the tortilla a crispy, buttery texture and a rich garlic aroma.
2. Choose Your Cooking Method
Skillet Method (Best for Maximum Crispiness)
- Heat a non-stick skillet over medium heat.
- Place the wrap seam-side down in the skillet.
- Cook for 2-3 minutes per side, pressing lightly with a spatula, until golden brown and crispy.
Pro Tip: Cook in batches to avoid overcrowding the pan.
Oven Method (Best for Large Batches)
- Preheat oven to 375°F (190°C).
- Place wraps on a baking sheet lined with parchment paper.
- Brush with garlic butter and bake for 10-12 minutes, flipping halfway.
Pro Tip: For extra crispiness, broil for the last 1-2 minutes.
Air Fryer Method (Best for a Healthier Option)
- Preheat air fryer to 370°F (188°C).
- Place wraps in the air fryer basket seam-side down.
- Cook for 6-8 minutes, flipping halfway through.
Pro Tip: Spray the wraps lightly with cooking spray before air frying for a crunchier texture.
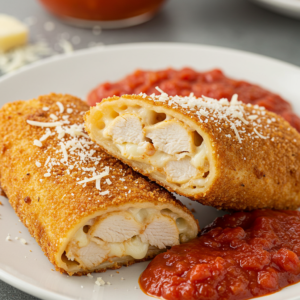
Step 5: Serve and Enjoy!
Now that your wraps are golden brown, crispy, and oozing with cheese, it’s time to serve them!
Serving Ideas
- Slice the wraps diagonally for a restaurant-style presentation.
- Serve with your favorite dipping sauce:
- Marinara sauce – Like a pizza wrap!
- Ranch dressing – Creamy and cooling.
- Garlic aioli – Extra garlicky deliciousness.
- Sriracha mayo – A spicy kick!
Pair With:
- A simple green salad for a balanced meal.
- Crispy fries or sweet potato wedges.
- Roasted veggies for a healthier side.
Pro Tip: These wraps taste even better the next day! Reheat in a skillet or air fryer to keep them crispy.
How to Serve Cheesy Garlic Chicken Wraps
1. Slice the wraps diagonally and serve hot.
2. Pair with a dipping sauce for extra flavor:
- Marinara sauce (for a pizza-like taste)
- Garlic aioli (for an extra garlicky punch)
- Ranch dressing (for a cool, creamy contrast)
- Spicy sriracha mayo (for a fiery kick)
3. Serve with a side salad, fries, or roasted veggies for a complete meal.
Best Cheese Options for Ultimate Cheesiness
| Cheese Type | Melting Quality | Flavor Profile |
|---|---|---|
| Mozzarella | Excellent | Mild, creamy, stretchy |
| Cheddar | Great | Sharp, tangy, flavorful |
| Provolone | Very Good | Buttery, rich, smooth |
| Pepper Jack | Great | Spicy, zesty, melty |
| Parmesan | Good | Salty, nutty, enhances garlic |
Pro Tip: A blend of mozzarella + cheddar + Parmesan gives the best mix of meltiness and flavor!
FAQs
1. Can I make these wraps ahead of time?
Yes! Assemble the wraps and store them in an airtight container in the fridge for up to 2 days. Toast them fresh when ready to eat.
2. Can I freeze these wraps?
Absolutely! Wrap them tightly in foil and freeze for up to 2 months. Reheat in a skillet or oven until hot.
3. What’s the best way to reheat these wraps?
- Skillet: 2-3 minutes per side
- Oven: 350°F (175°C) for 10 minutes
- Air Fryer: 5 minutes at 370°F (188°C)
4. Can I use rotisserie chicken?
Yes! Using pre-cooked rotisserie chicken makes this recipe even faster.
5. How do I make these wraps healthier?
- Use whole wheat tortillas
- Swap cheese for reduced-fat versions
- Cook chicken in less oil or air fry it
Final Thoughts: Why You’ll Love This Recipe
These Cheesy Garlic Chicken Wraps are the perfect combination of crispy, cheesy, garlicky goodness. Whether you’re making them for a quick meal, packing them for lunch, or meal prepping for the week, they never disappoint. Try them today, and let me know how you like them!
Don’t miss this garlic-packed recipe: Garlic Hawaiian Rolls Recipe
Which variation are you trying first? Let me know in the comments!
6 thoughts on “Cheesy Garlic Chicken Wraps: The Ultimate Crispy, Cheesy Delight”